As many of you know I have a Brother SE400 and while it sews great I also have the option to do machine embroidery. The more embroidery I do the more I love it. If you think you might be interested in trying machine embroidery now is the time to get yourself a machine. For those of you who have a sewing machine in good working order you can purchase an ‘Embroidery Only’ machine.
The Brother PE500 is such a machine and Walmart has them on Black Friday for $200.
I recently was lucky enough to purchase a Brother PE-770, it is also an embroidery only machine, it comes with a larger hoop (5×7) instead of the 4X4 that comes with the SE400 or the PE500. I love it! Of course there are other great brands such as Singer, Janome but I have never used them. I love my Brothers!
Now let’s get started on that toilet paper.That’s right, you read it correctly. I have discovered the world of Toilet Paper Embroidery. Why? That was my first thought but they are so cute and so easy to do. People love them, they are fun, and they really are a cute design in your bathroom during the holidays. Pick the right design and you can give them to your mailman, hairdresser, teacher, coworkers, the list is endless and everyone who sees them wants a roll. Today I am using a free design, if you want to download the design just click on the photo and it will take you to the link.
I used Cottonelle toilet paper but this is not written in stone. I selected this brand because to me it felt more like a fabric. I have seen rolls made with Charmin, store brands, etc. They are all cute.
Other supplies that I used was Embroidery Thread, Medium weight Cutaway Stabilizer, Pellon Sol-U-Film Lite, Mettler Web Bond 105 spray adhesive, and my embroidery Hoop,
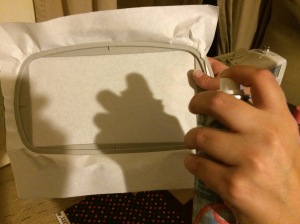
Okay, lets get started. First step is to hoop the cutaway stabilizer.
Next I like to lightly spray my temporary spray adhesive in the center of the cutaway. This helps to hold the toilet paper that I will be placing next.
I now attach my hoop to the machine. You can use the guide that came with your machine to make sure the paper is in the center of the hoop. I have to admit I don’t normally do this but for beginners it helps to see where your design will stitch. No matter what size your hoop is the design will always be in the CENTER.
When preparing the toilet paper turn under two sheets of the toilet paper. Make sure that you are turning it the right way so that the design that you are stitching is on top.
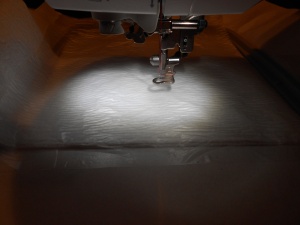
I use the ‘float’ method when using toilet paper. What that means is that you are not going to hoop the paper as you did the stabiilizer but will lay the paper on top of the stabilizer. This is where the temporary adhesive comes in handy. It helps to hold the paper in place as it stitches.
After setting toilet paper in place I lay a piece of the Pellon Sol-U-Film on top of it. The Sol-U-Film is normally used to prevent your stitches from going too deep into whatever you are sewing on. Again this is not written in stone, there are those that don’t use this at all and it works for them.
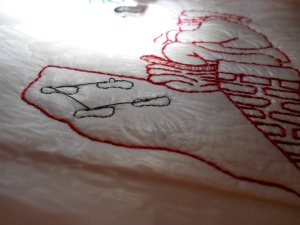
Now it is time to begin stitching. The first color is Santa sitting on the chimney in red.

Next comes the black for the foot steps leading to the chimney.
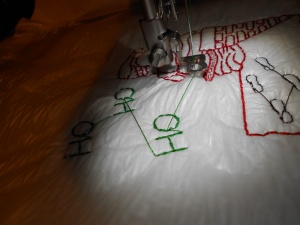
Last but not least is the HO Ho Ho words written in green.
Time to remove the hoop. First you need to cut all the ‘jump’ stitches. These are the threads that goes from one part of the design to another. After this you can pull away the Sol-U- Film. Again you may not elect to use the film. It is all a preference and what works for you.
Trim the cutaway on the backside to the size of the design.
At this point I spritz another small amount of the spray adhesive to the backside of the design, roll your toilet paper back up and tada! Now you have to admit that it is cute.
I have done a couple of other designs and have more designs to come. These are waiting for the cellophane wrap and tie them up with a pretty ribbon.
The Snowman and Santa’s behind can be purchased from a site called Goodies by Gail. She has over 100 different designs, not just Christmas designs. You are sure to find one you want to try out.
May your needles always be sharp,
Your bobbins always be full,
And your stitches always be straight.


This is so immensely cute! I’ve never thought of this before but it gives indeed a festive atmosphere.
That is so incredibly clever! I like this idea for decorating spare tp rolls much better than those dolls with giant knit skirts.